Re: 从零开始的 React Native 之旅(一)
AI generated summary
The writer is learning and practicing React Native by creating an app called Follow. They are motivated to write code after work and plan to document their learning process in weekly blog updates. They set up the development environment, handle dark mode, implement user authentication, and fetch user information. They encounter some issues with Safari on iPhone and cookie-based authentication in React Native. The writer plans to work on setting up a database for the app in the next week.
为什么要写 rn
一个是我自己还没正儿八经地写过 rn,想试试它的体验怎么样。加上最近对 Follow 这个 RSS 阅读器很感兴趣,但是它暂时还没移动端,可以作为我边学习边实践的对象。再有就是最近开始上班了,自己老是没什么动力在下班后写点想写的代码,有个目标更容易让自己专注。
同时也立个 flag,把学习和开发的过程写成每周更新的小博客,欢迎大家关注。
准备工作
hello world
好了,废话不多说,让我们跑起来第一个 app 吧。不过正所谓“工欲善其事,必先利其器”,我们先准备好环境。
一般来说你只需要安装好 Xcode 就行了,不过如果你像我一样,最近升级了 macOS beta 的话,就会麻烦一些:
- App Store 里的 Xcode 是不能打开的,和系统版本不匹配。
- 下载完的 Xcode beta 没办法直接打开,提示
the plug-in or one of its prerequisite plug-ins may be missing or damaged and may need to be reinstalled.,需要手动安装Xcode.app/Contents/Resources/Packages/下的安装包。参见 https://forums.developer.apple.com/forums/thread/660860 - 命令行中需要 select 到你在用的 beta 版 Xcode,
xcode-select -s /Applications/Xcode-beta.app。
然后就是需要一个 nice 的脚手架,我不太熟悉 rn 这边的技术栈,看完 State of React Native 就选择了之前在 Twitter 上看到的 Create Expo Stack。
📢 Create Expo Stack v2.10 is here! In this version: 1⃣ NativeWindUI has been moved to the styles section returning CES to its original interface 2⃣ Stack, Tabs, & Drawer + Tabs options for NativeWindUI Stabilizing Create Expo Stack over the next month via a testing suite 🙂
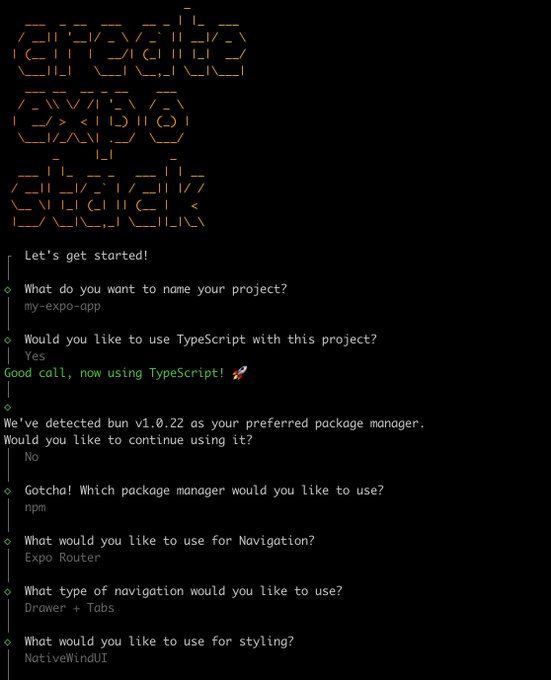
它除了作为一个 expo 项目的脚手架之外,还给你提供了很多主流技术栈的组合选项,这对于我想尽快开始写 app 非常友好。最终我选择的组合是:
npx create-expo-stack@latest follow-app --expo-router --tabs --tamagui --pnpm --eas
处理深色模式
脚手架默认为只支持浅色模式,强迫症表示不能接受,所以首先处理一下先。参考这个 issue,我需要修改 expo 的设置为:
{
  "expo": {
    "userInterfaceStyle": "automatic",
    "ios": {
      "userInterfaceStyle": "automatic"
    },
    "android": {
      "userInterfaceStyle": "automatic"
    }
  }
}
然后你的 useColorScheme 就能正常获得用户当前选择的主题模式。不过需要注意的是,修改完这个配置,你需要再执行一次 expo prebuild,确保 Info.plist 文件里 key 为 UIUserInterfaceStyle 的值为 Automatic。
正戏开始
好了,现在我们来写 Follow app 吧!
登录账号
虽然 expo 文档有很详细的 Authentication 接入文档,但我们不需要使用它。 Follow 的网页端已经处理好了,我们只需要调用网页端的登录,为 app 注册处理网页登录后会跳转的 scheme 链接就好。
首先设置好 app 的 scheme,在 app config 里面设置 scheme: 'follow',然后运行一下 expo prebuild。
用 expo-web-browser 打开 Follow 登录页面:
await WebBrowser.openBrowserAsync('https://dev.follow.is/login')
然后用 expo-linking 注册 url 的监听事件,在接收到登录网页调起的 url 信息后,解析里面的 token。
Linking.addEventListener('url', ({ url }) => {
  const { hostname, queryParams } = Linking.parse(url)
  if (hostname === 'auth' && queryParams !== null && typeof queryParams.token === 'string') {
    WebBrowser.dismissBrowser()
    if (Platform.OS !== 'web') {
      SecureStore.setItemAsync(SECURE_AUTH_TOKEN_KEY, queryParams.token)
    }
  }
})
这里还遇到的一个问题是 iPhone 上 Safari 的异步函数里的 window.open 会无效,需要加上 target="_top" 的参数。参考 https://stackoverflow.com/q/20696041/15548365
因为 url 会跳到 auth 这个页面,我们可以加个让它跳到主页的路由 app/auth.tsx。
import { router } from 'expo-router'

export default function Auth() {
  router.navigate('/')
  return null
}
OK,这样我们就已经能够获取到用户的认证凭据了。来试试调个接口看看。
获取用户信息
在 rn 中发起网络请求看起来和 web 没有区别,我们仍然可以使用自己喜欢的库。
function useSession() {
  return useSWR(URL_TO_FOLLOW_SERVER, async (url) => {
    const authToken = await SecureStore.getItemAsync(SECURE_AUTH_TOKEN_KEY)
    const response = await fetch(url, {
      headers: {
        cookie: `authjs.session-token=${authToken}`,
      },
      credentials: 'omit',
    })
    const data = (await response.json()) as Session
    return data
  })
}
这里我暂时做了一点反常的设置,是因为 rn 中基于 cookie 的身份验证存在一些 已知的问题,如果不设置 credentials: 'omit' 的话,就会在第二次请求时设置不正确的 cookie,导致请求失败。这里是参考 https://github.com/facebook/react-native/issues/23185#issuecomment-1148130842 的做法。
有了数据我们就可以渲染页面,这里先简单写写:
export default function UserInfo() {
  const { data: session, mutate } = useSession()

  return (
    <YStack flex={1} padding={20}>
      {session ? (
        <YStack>
          <XStack gap={24} alignItems="center">
            <Image
              source={{
                uri: session.user.image,
                height: 100,
                width: 100,
              }}
              borderRadius={50}
            />
            <YStack gap={8}>
              <Text color="$color12" fontSize="$8" fontWeight="600">
                {session.user.name}
              </Text>
              <Text color="$color12" fontSize="$5">
                {session.user.email}
              </Text>
            </YStack>
          </XStack>
        </YStack>
      ) : (
        <Button onPress={handlePressButtonAsync}>Login</Button>
      )}
    </YStack>
  )
}
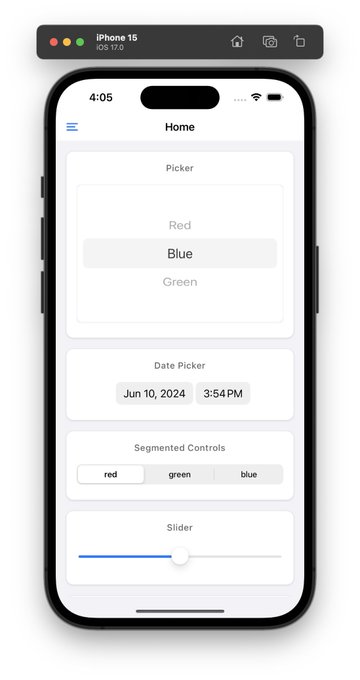
好了,来看看现在的效果。
:::div{style="max-width: 400px"}
:::
啊哦,看起来 Follow 的网页端还需要做点移动端适配,我又可以水 PR 了。
总结
总算是有个能跑的软件了,下周要做什么呢?或许是给 app 设置数据库?写 app 的话还是希望我们可以在弱网甚至无网环境中正常浏览我们的订阅。欢迎大家聊聊自己的想法。